Google Docs is a powerful business productivity application loaded with handy features for collaboration. Although many people use Google Docs every day, there are still many users who are hesitant to leave their old desktop office applications behind and adopt cloud-based options like Google Docs.
To help clear up some of the hesitancy, we’ve detailed several Google Docs tips for sharing and collaborating that make the app more useful and help you stay more productive, as explained by Zapier.
If you’re feeling unsure about the switch to Google Docs, or you’re just looking for some tips to make the best use of your time, these Google Docs tips are right up your alley! (Tips for adding and editing images can be found in Part One).
Share and Collaborate
1. Share a Doc publicly
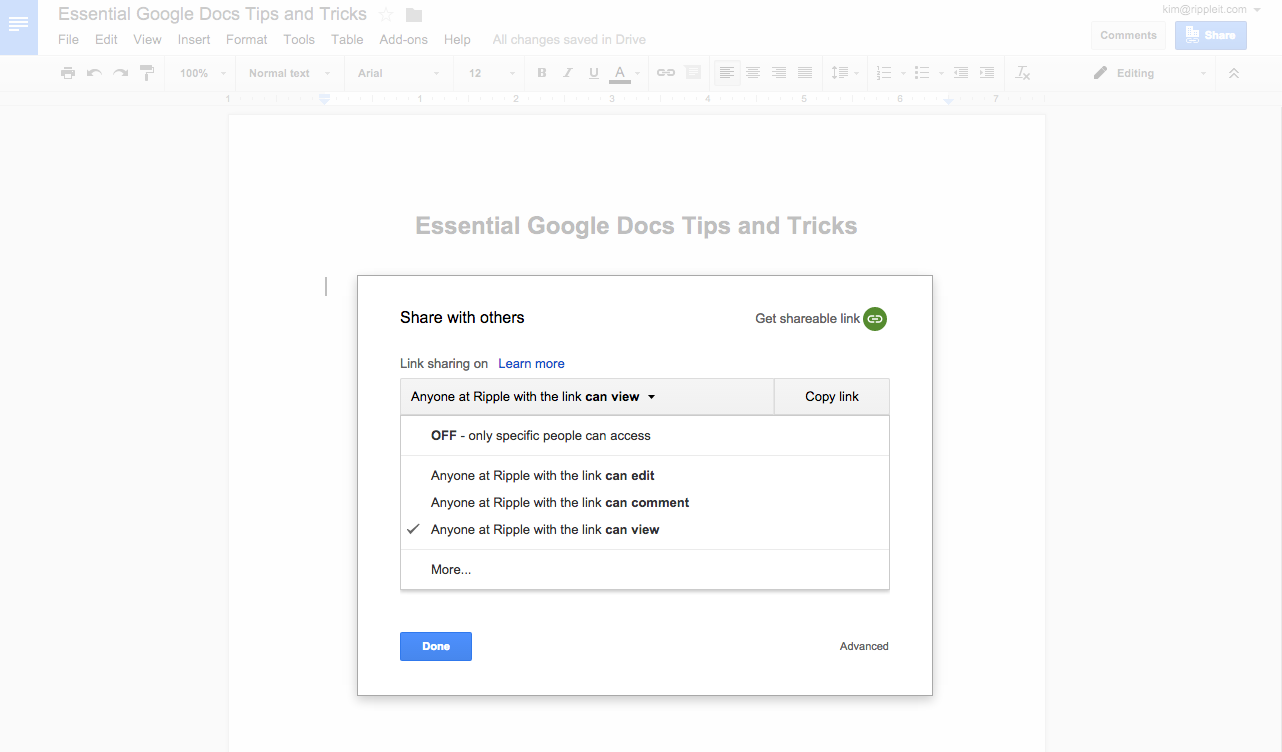
If you’re already using Google Docs, then right about now you’re probably thinking “everyone knows this one.” You may already have sharing documents with colleagues and friends mastered, but public sharing can be put to good use if you’re looking to embed your document on a website or give anyone access to your document. Navigate to the “Share” menu in the upper-right corner and you’ll be given all sorts of options for sharing your document with others.
2. Publish or embed a Doc on the Web
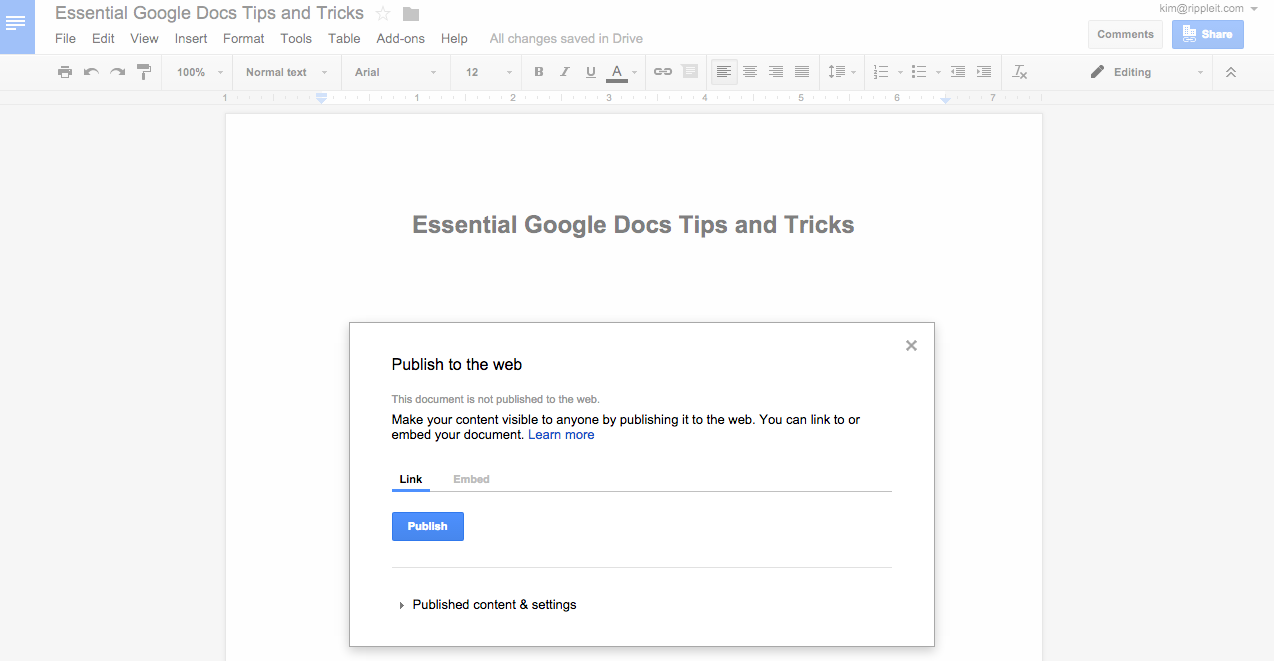
Google Docs allows you to publish your document as a webpage or embed it within a page by navigating to “File” in the menu bar, then selecting “Publish to the web.” Once there, you can either retrieve a public URL or an embed code. If updates are made to the document, the page will be updated within five minutes.
3. Customize editing permissions
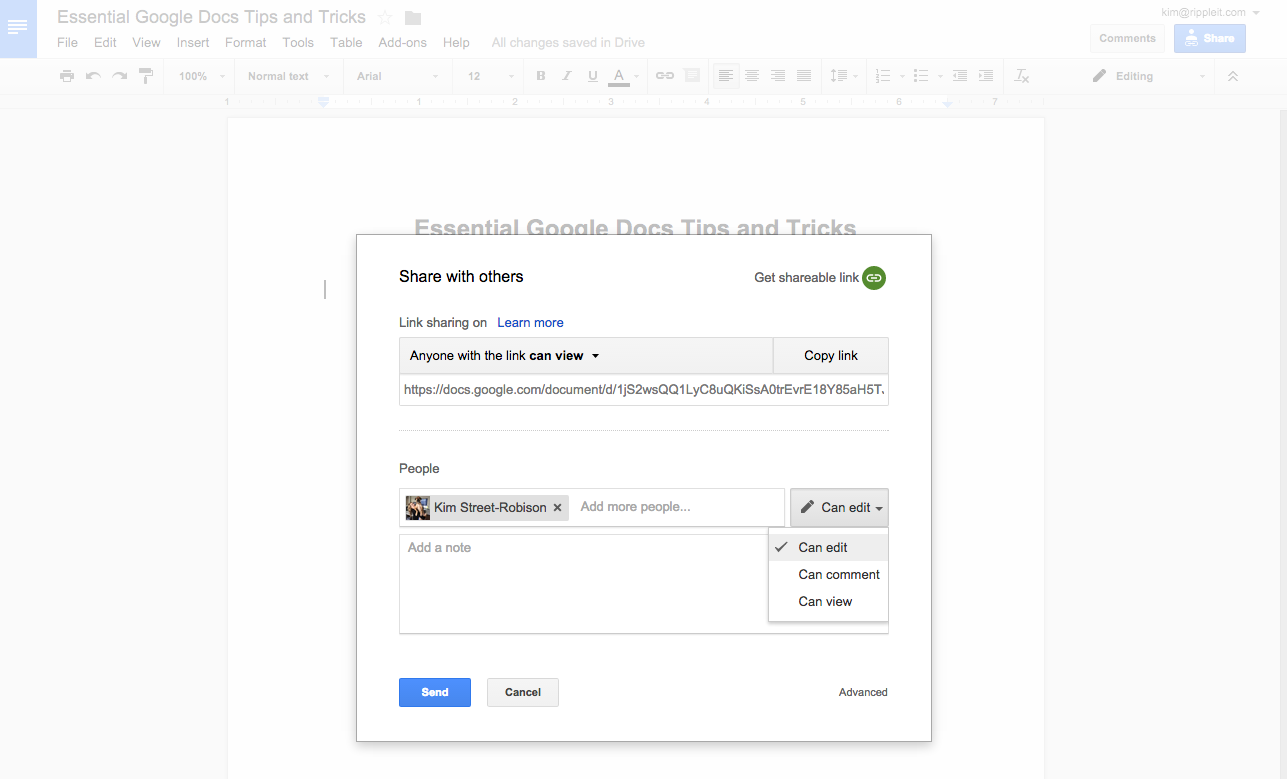
Google Docs allows you to customize who is able to view your documents and allows you to control how each person is able to interact with the document. You can grant others the ability to edit and comment for helpful feedback within your document or just give them viewing access to read over your work.
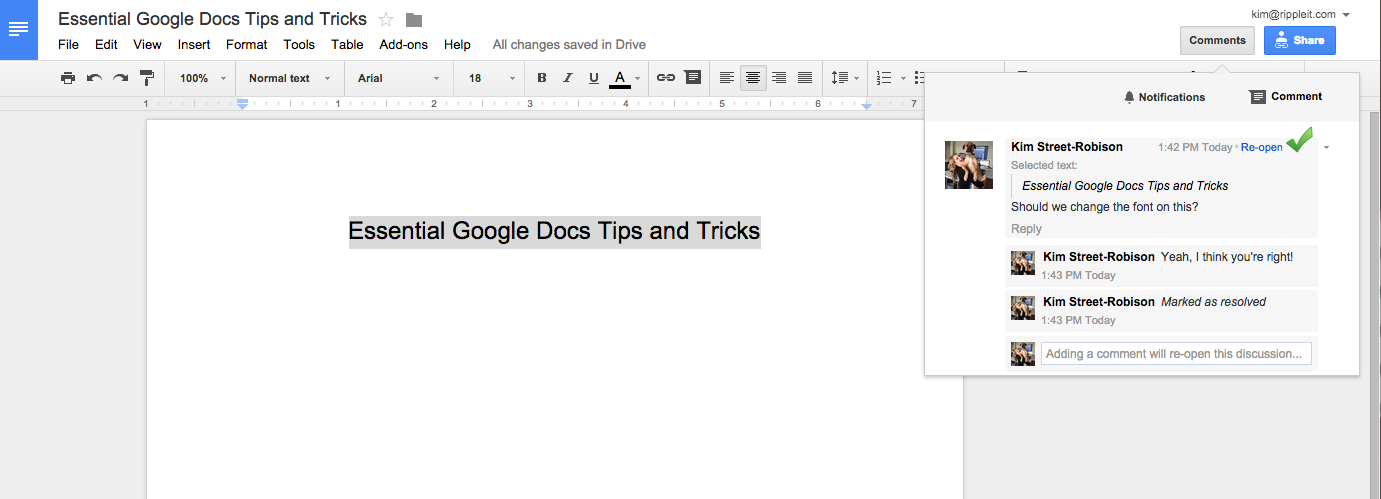
4. Use comments and notifications for effective collaboration
5. Tag specific collaborators in comments
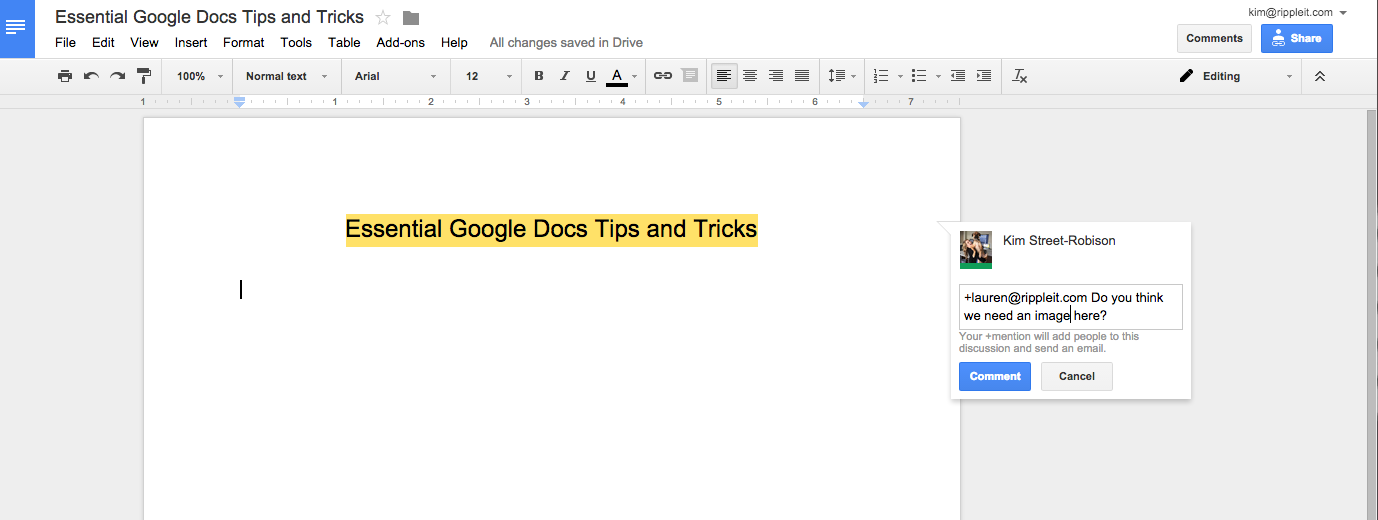
You can easily grab a fellow collaborator’s attention by tagging them in your comment using the @ or + symbol, followed by their name(s). Google Docs will list options based on your Gmail contacts and will notify the collaborator via email. You’ll be prompted to change permission levels for the collaborator if they don’t have access to the doc.
6. Email your Document
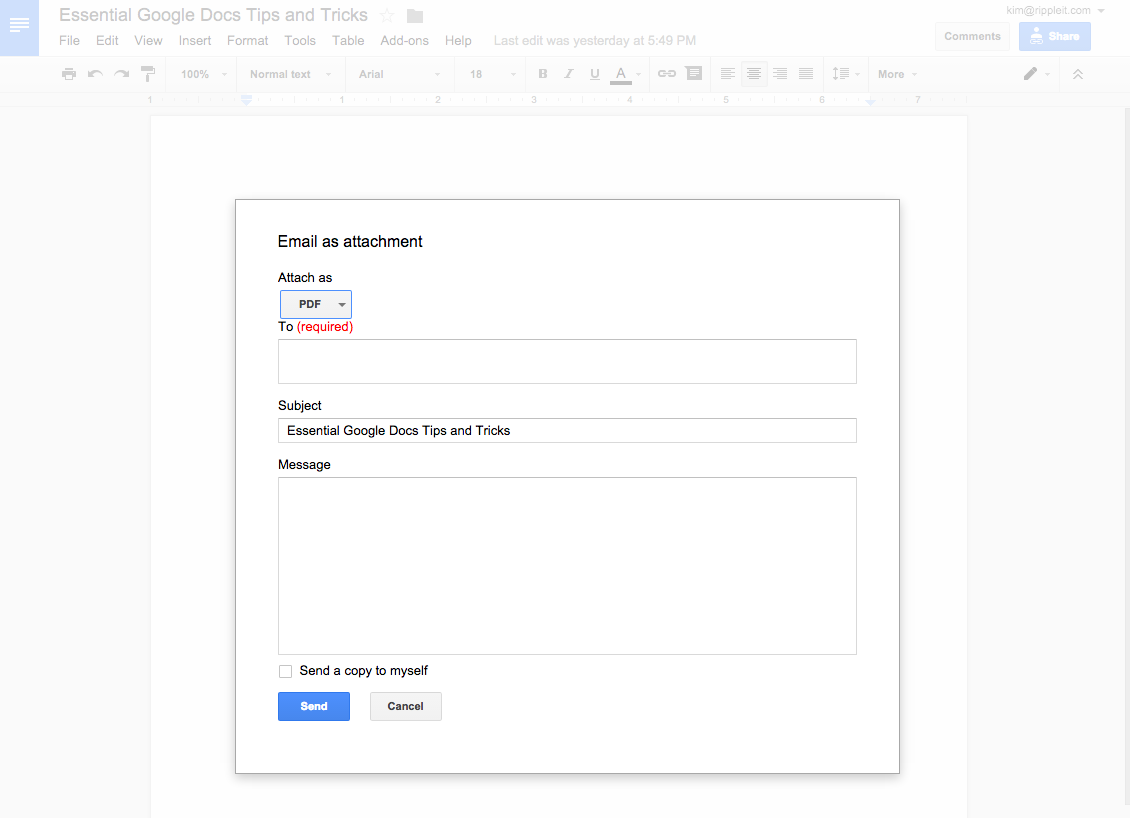
There may be times when you’d like to share your document with someone that isn’t very familiar with Google Docs. In such cases, “Email as Attachment” is quite handy. Found in the “File” dropdown menu, you can enter your contact’s email address and a message before sending. You’ll be able to select a file type (PDF, DOCX, or RTF) or you can have Google Docs paste the document into the email.
7. Download your Document as a Word Doc, PDF, and more
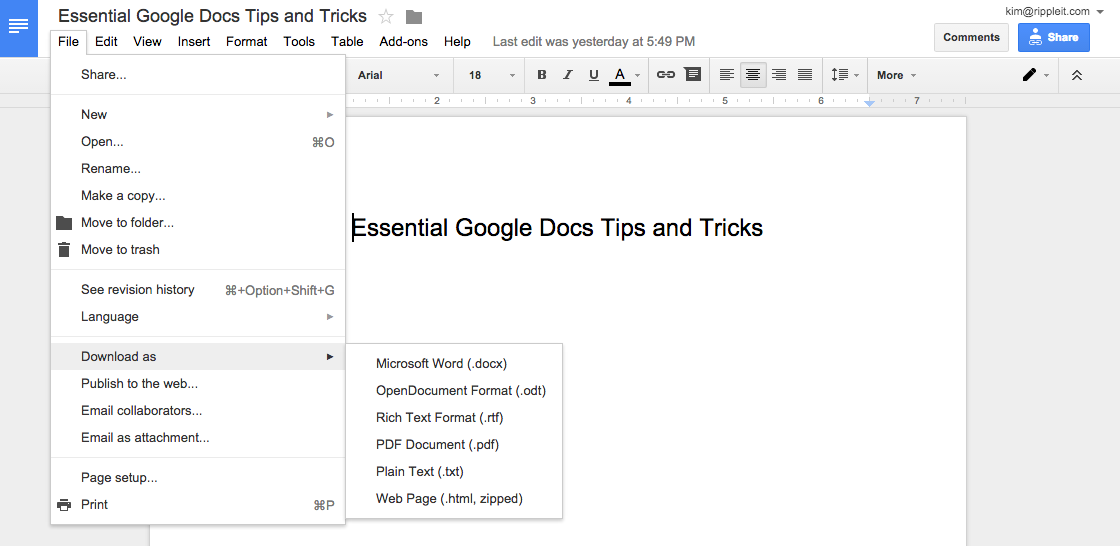
There will be times when you’ll want to send your document as a finished copy rather than an editable document (like if you’re sending a resume). To do this, you’ll need to access the “File” dropdown menu, then choose “Download as.” From there, you’ll be given the following formats to choose from: Microsoft Word (.docx), OpenDocument Format (.odt), Rich Text Format (.rtf), PDF Document (.pdf), Plain Text (.txt), and Web Page (.html, zipped).
8. Change your viewing mode

If you’d like to view your document without editing, you can choose “Viewing” from the dropdown in the upper right. This will allow you to review your document without accidentally making any changes.
9. Use suggestions when collaborating
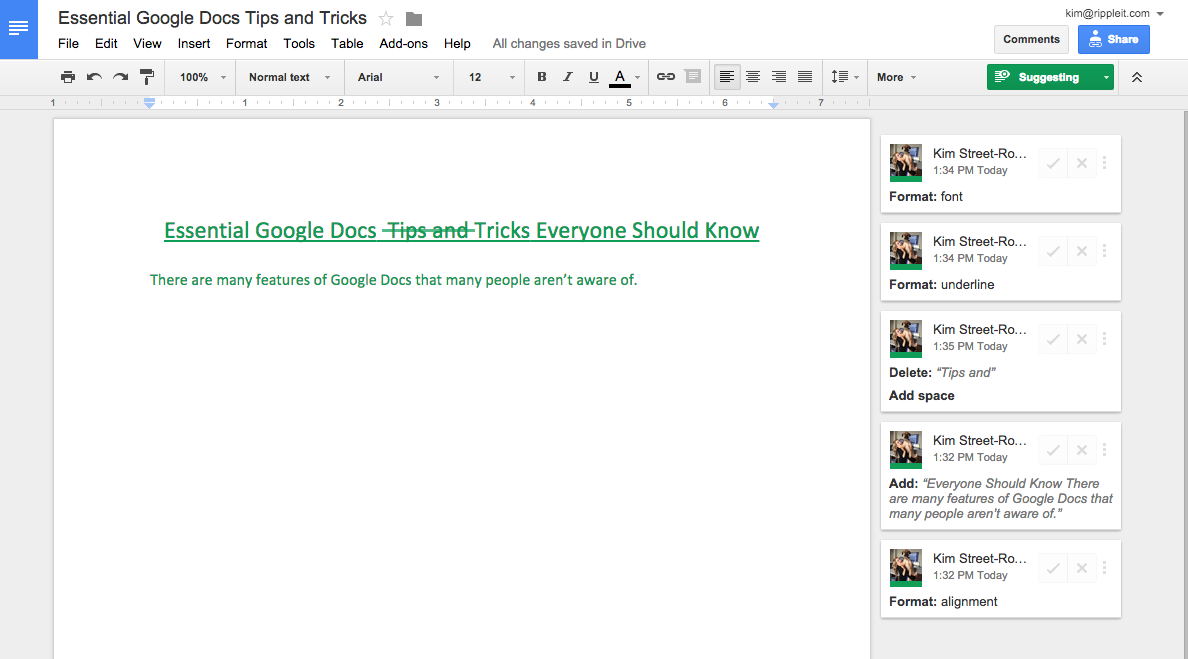
Edits become suggestions using the “Suggesting” view. You and your collaborators can edit your document without actually committing the changes and all suggestions are displayed in a different color. All suggestions are tracked in the sidebar on the right where you can accept or reject the proposed edits.
10. Use revision history to go back
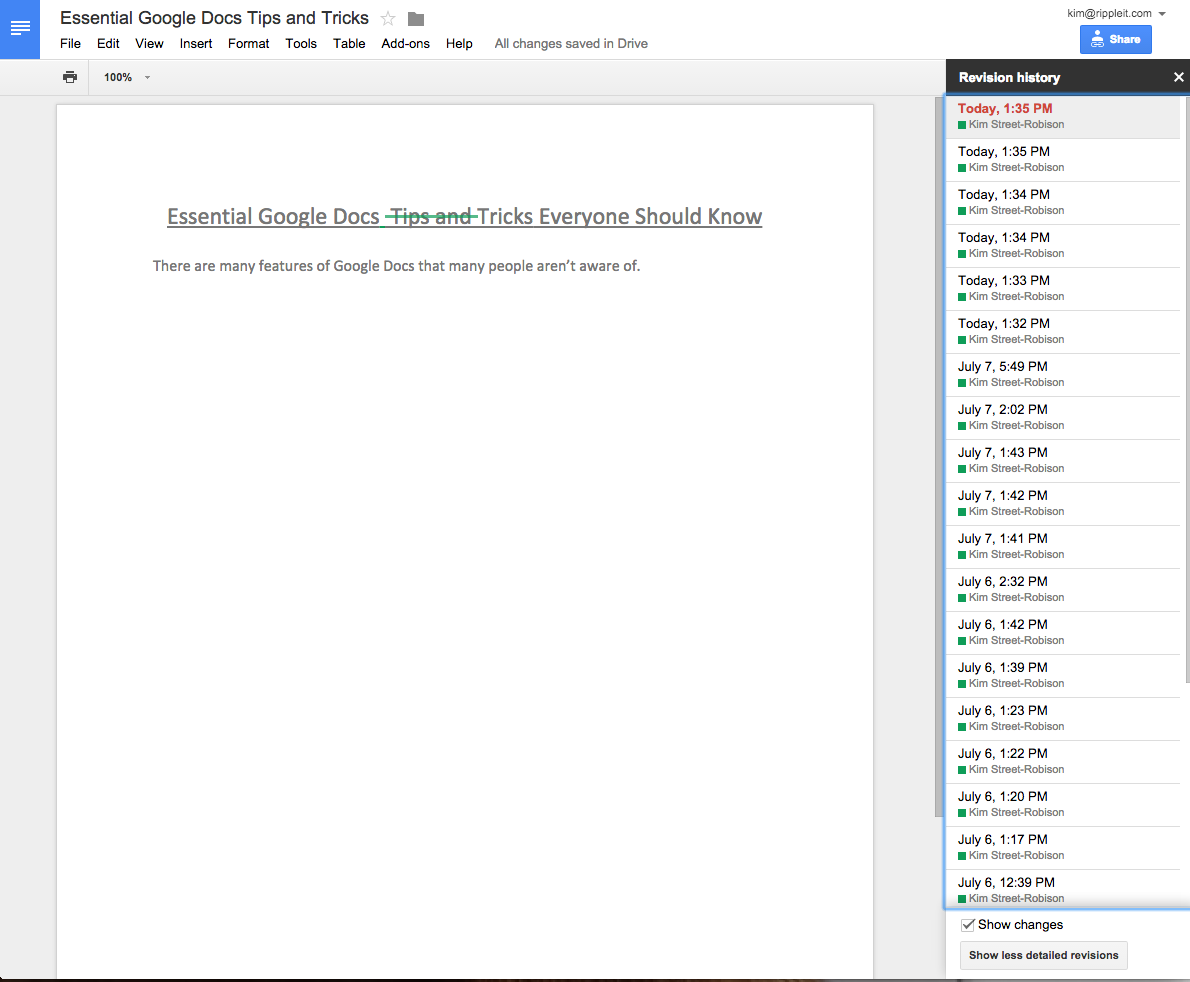
If you’re interested in seeing all the changes that have been made to your document, you can navigate to “See Revision History” from the “File” menu. The list will go all the way back to when the document was first created. The revisions list only shows the date, time, and name of the editor, but you can easily view and restore revisions if you select “Show Changes.”
Coming up Next…
Stay tuned for more Google Docs tips and tricks! Next, we’ll go over shortcuts and tricks to speed up your editing, as well as how to use add-ons and integrations.
What Google Docs tips help you stay productive? Leave them in the comments below!
Don't Fall Behind!
Get the latest work-from-home and Humans First® IT tips straight to your inbox.
